Friday, March 12, 2010

Can you see the light?

Lighting can make a photo or break a photo.  And it is up to us as photographers to use the lighting available to us to achieve the end result that we are looking for.  I have gone through the last 7 years knowing in my mind that taking photos outside, on a cloudy day, will give you the best results.  Why?  Well I don't know or at least I didn't know, but I could see the difference in my finished product and I loved the look of any photo I took on a cloudy day, the colors seemed to be so sharp and just right.  I also knew in the back of my mind that late afternoon, dusk, or sunset could also give me the look and feel that I wanted in a photo.  Again, why?  Well as I said earlier, 'I don't know?', but photography class lightened some of the unknown regions in my brain and made things make sense, at least a little bit.

So here is my little explanation about lighting.

There are four different characteristics to lighting and they will all help you to make others love your photos and to make yourself love them even more.  Understanding the characteristics and how they show up in a photo can also let you make the same subject look many different ways.

The four characteristics are:

  1. Intensity - the amount of light.  Is it bright, bright, or softer?  Look at the intensity and decide how you want your subject to look.  Study photos that you have taken and see what appeals to you the most.  Most cameras can compensate, especially when there is not enough light.

  2. Directional - this type of lighting we can control, either by moving our subject or moving ourselves.

  3. Degree of Diffusion - lighting may be direct, less diffused, directional diffused, some shadow - soft, or fully diffused - like on a cloudy day or in direct shade.  Cloudy days are completely diffused lighting, every thing is even and soft, no hard edges. 

  4. Color - different types of lighting will give you a different color cast, for lack of knowing what else to call it, to your photos.  A candle will give you rich red tones, sunlight will give you a cold blue light, while tungsten, the lights we put into our fixtures, will give you a red/yellow tone, and florescent lighting will give you a blue/green tone.
When taking photos we need to look for the lighting that is available, is it cold or warm, and know exactly what we want to convey in our pictures.  An example is taking a photo in the early morning or late afternoon light will produce a warmer, more reddish color, while taking a photo at midday will give you a more colder, or bluer cast to your photo.  Again, we need to decide what we like and what we want to convey.

Now we can move on to '3 Point Lighting'.  Sounds fun doesn't it?  The deal with '3 Point Lighting' is to use the light that is available and it is most readily used when taking portraits.  The three different points of lighting are:
  1. Key Light - sets the mood
  2. Fill Light - fill shadows
  3. Hair or Back Light - separates the subject from the background
By using these different types of lighting you can convey a lot of different moods and feeling in your photos.  The most used and dramatic of these types of lighting is 'Key Lighting', in the photo below each face is lit by a different type of Key Lighting.

The four different types of  'Key Lighting' are:

  1. Short - Formed by creating a shadow on the camera side of the nose but not past the lips.

  2. Broad - Creates shadow on the side away from the camera.

  3. Glamour/Paramount/Butterfly - Light is directed to the nose, creates a little butterfly under the nose shining down, and gives a look like the old black and white moves from the 50's.  Glamour.

  4. Rembrandt - A Triangle of light on the cheek, more dramatic and more attractive.

'Three Point Lighting' will most likely be used in a studio setting, but if you are aware of the light when you are taking photos you will be more likely to place your subjects in a more pleasing setting.  This can be achieved outside by moving your subject or the camera, or inside by using the lighting that you have available, whether that be a lamp or a window.  There are many ways of getting light that you want, you can also use bed sheets and cookie sheets to reflect which will act as a fill light.  You may also note that when light is directed at the face from below, pointing up, it will convey the feeling of evil, but if you place the light shining down onto the face it will convey goodness. 

Fill Light is used to fill in shadows and is created by the key lighting.  Hair and backlighting will separate your subject from the background.  The direction that the light comes from is where the inspiration comes from.  You can also achieve a spark of light in the eye with directional lighting, which can convey an impish or alive impression, whereas no light in the eyes conveys a feeling of lifelessness.

So that is what I have learned so far when it comes to lighting.  I know, it's a lot and I am still trying to figure it out myself, remember I took lots of notes that I can always go back to.  When I watch movies I look at the faces and see how the lighting is used.  This photography class has changed how I look at faces.  Right now I find it hard to pick out exactly what type of lighting is used, but I am sure that as I keep looking it will become easier.  The point is to look at the lighting around you and as you take photos of the people you love, be aware of the way the lighting is affecting the way they look.

Remeber to ask yourself, 'Is it flattering or is it making them look like an evil, dead vampire?'  My vote is to always make them look as young and pretty as possible, they will love you for it.

Love to All,

midRae

Wednesday, March 10, 2010

One Word Wednesday.....


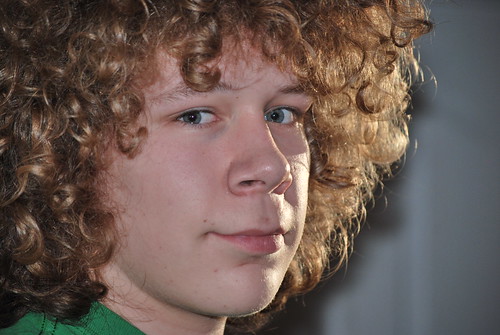
froSon

(save the fro or shave the fro that is the facebook questions?)

Love to All,

midRae

Friday, March 5, 2010

Elements are.....

what makes a photo pop, standout, grab you by the eyes, and keeps you coming back, what drew you in, is very obvious, visual structure is obvious in the frame.

Composition is the pleasing arrangement of elements within the frame of a photograph and it's up to us, photographers or photographer want-to-be's, to make this happen.  I think we all understand, up to a point, that there is just something about that photo that keeps bringing you back. You are not sure exactly what that something is but it just feels right. 

As I said in my last post, I will explain, at least to the extent that I know and understand, what the Elements are that are needed for a pleasing and even great composition.  Please remember that I took this homework assignment literal and these photos, that I am about to share (beware), are not my favorite's, I have done much better in the past.  Along with still trying to get the exposure correct I have OCD and I am not afraid to use it as an excuse.  I am usually a very literal person and I am terrified of ever doing anything incorrect.  I can be creative and love color, sunsets, and can usually see things in an artistic manner, but when I am given a specific assignment, you will get what that assignment was.  No artistic midRae in the mix. 

Onward!!!  Be brave folks.

The first thing you need to ask yourself and answer if possible are the following questions:
  • Whole or Part?  Should I shoot them all, wide, close-up, etc..
  • Vertical or Horizontal?  Try both.
  • Framing?  What's in, what's out?
  • Background?  Make sure to see everything, look.  You don't want weird things happening.
And now to our first element:

Spot:  a central, most dominate, simple pinpoint, draws the eye, central focus point.


This is an example of Spot photography with Dept of Field.  It also shows Texture.

Line:  series, create line, simple background


This is an example of Line and Texture.

Shape:  prominate structure, bigger, fills frame, mass, simple background


This is an example of Shape and Contrast.

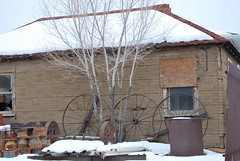
Texture:  surface visually interesting, touch the object, walk through.


It's a little hard to see in the particular picture, but the house is covered in asphalt shingles, my idea of a good example of Texture.  But you may not want to walk through this place.

Pattern:  repetition, repeat, strong visual.


This is an example of Pattern, Repetition, Shape, and Line.

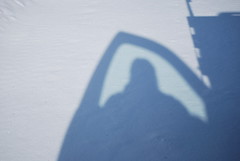
Contrast, Value, Tone:  various levels of light, contrast dark to light.


This one is pretty obvious.  Contrast, Self-portrait if you want, or not.

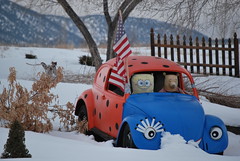
Color:  create interest, color is a strong element, gives appeal.  Make sure that one or more colors dominate.


Color, but also Spot.

So there you go a few example of how you should never take photography literal.  But they are all good examples of each of the Elements.  The only thing I can say as a new photographer is take lots of photos, practice, practice, practice.  With practice you will learn what is pleasing and what isn't.  I think we all have our favorite kinds of shots and the trick for us is to make it appealing to others.  We also need to remember that a lot of the times we react to a photo with emotions, the photo will have an emotional attachment for us.  Something speaks to us.  We hope to make our photos speak to others and touch them just as they have touched us. 


Just like my photos of 'Grandpa Trees' speak to and touch me.

Love to All,

midRae
The Accidental Photographer

Wednesday, March 3, 2010

Tuesday, March 2, 2010

A Few Asked

And here I go.

Over the month of February, actually it was only four Wednesday's, I took a photography class at our local University.  Now as the instructor told us, we went over one semester of information in 6.0 hours, and I have to agree with him that it was a lot of information to absorb.  Thank you Milford High School teachers for teaching me how to take notes, and take them fast.  I admit that I still have a hard time feeling completely comfortable with Aperture's and when to change them, it depends on what I want to show but I guess I am still trying to figure that out, although I do understand Shutter Speed and what you can get with either a fast or a slow speed.  I think I have grown in my abilities to take photo's and to understand what makes a good photo, now I just need to find the time to practice, practice, practice, and practice some more.

Our first class we went over the different types of camera's, SLR (single lens reflex) and digital.  We also covered Aperture's, Shutters, Depth of Field, ISO, Types of Lens, Lens Effects, Focal Length, and Composition.  WHEW!!!  I need to take a breath.  We also talked about SEEING.

Seeing? You ask.  Well seeing like a photographer, thinking like a photographer, seeing colors, seeing shapes, seeing light and it's effects, seeing texture and detail, seeing motion, seeing people and their differences, and seeing places.  When it comes to seeing, that big fancy camera does not matter, the knowledge of technology will come with time, what does matter is how and what you see.  On a side note, us a tripod or monopod, you will get much sharper and clearer images.  As Mr. Smith, our instructor told us, we want to be able to have a good or great picture going in to editing, good in means good out, bad in means no amount of editing is going to make it a great photo.  Look for the photo opportunities and don't be afraid of taking lots and lots of pictures.  Also you have to be willing to delete the bad and not so good photos.  I personally find that a little challenging.  It feels like I am deleting something important, I am working on getting over that.

We went on to discuss that even if we take amazing photos, if we are not willing to share, display, publish, or show our work no one will see all of the amazing things that we have captured.  Do you have a box of photos under your bed that no one ever gets to see?  Well, bring them out for the world to see.  Be proud of what you have done and share, even if it is only with the family.  I promise, I have more than my fair share of photos that I would love for no one to ever see, but we need to show it all, that way when we have something beyond amazing our family, friends, or the world will notice and tell us.  Then we can do it again.

We then moved on to discussing Elements.  Elements are what make a great photo.  It's what drew you to the photo, the visual structure and what pops.  Look at a photo and ask yourself what is pulling you in to that photo, what is keeping your attention, what keeps bringing you back.  


In my next post I will give you a list, short explanation, and my photo on what each Element is.  I have to say that with this assignment I took everything he said literally, I have since learned that not everything has to be literal.  You will understand as you look at my photos, I could and have done much better work by accident.  It's a little challenging when you are OCD and hate to do anything wrong.  Literal should become a bad word in my vocabulary.

Love to All,

midRae
The Accidental Photographer